On Windows, you can either install Kando via winget, via an installer, or by downloading a ZIP archive.
You can follow the steps below or watch the video above to get started!
Installing Kando on Windows
Installation via winget
Section titled “ Installation via winget”Using winget is maybe the easiest way to install Kando on Windows.
It’s not shown in the video above as it was released for winget after the video was created.
-
Type Win + R to open the “Run” dialog. Type
cmdand press Enter to open a command prompt. -
Type the following command to install Kando:
Terminal window winget install kando -
After the installation, you will find Kando in your start menu. Just click on the Kando icon to start the application. Not much will happen, as Kando is a tray application and will run in the background.
-
You can now start using Kando! Just press Ctrl + Space to open the example menu!
Installation via the Installer
Section titled “ Installation via the Installer”The installer will install Kando on your system and add it to your start menu.
Just head over to the releases page and download the latest installer. It’s the file which ends in *.Setup.exe file.
-
Double-click the downloaded file to start the installation process. Not much will happen, as the installation process is very minimal and does not require any user interaction.
-
After the installation, you will find Kando in your start menu. Just click on the Kando icon to start the application. Not much will happen, as Kando is a tray application and will run in the background.
-
You can now start using Kando! Just press Ctrl + Space to open the example menu!
Installation via the ZIP Archive
Section titled “ Installation via the ZIP Archive”The zip archive is the standalone version of Kando. You can also download it from the releases page. It’s the file which starts with Kando-win32-x64-* and ends in .zip.
-
Extract the archive to any directory you like.
-
Run the
kando.exeexecutable from the extracted directory. Not much will happen, as Kando is a tray application and will run in the background. -
You can now start using Kando! Just press Ctrl + Space to open the example menu!
Common Issues
Section titled “ Common Issues”Sometimes, Kando may not start correctly on Windows.
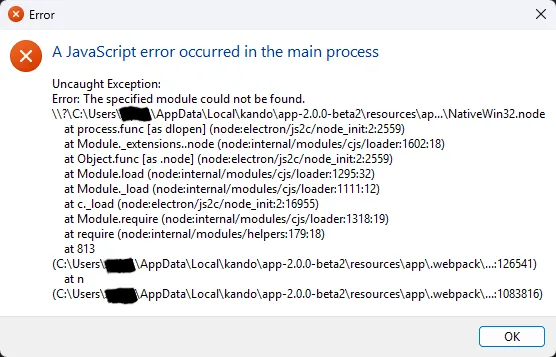
If you see the following error dialog telling “Error: The specified module could not be found” and that NativeWin32.node is missing, you can fix this by installing the latest version of the Visual C++ Redistributable from Microsoft.